
Release to the App Store and Google Play
Connect your own App Store Connect and Google Play accounts; Craftkite builds your mobile app and sends it there.
Updated October 12, 2026
Your apps are published under your own developer accounts. Craftkite builds the app for iOS or Android and sends it to App Store Connect (TestFlight) or Google Play. Whether store builds are included in your plan, and how many a month, is shown on Pricing.
Step 1: connect your store accounts
Open Store publishing in the side menu.
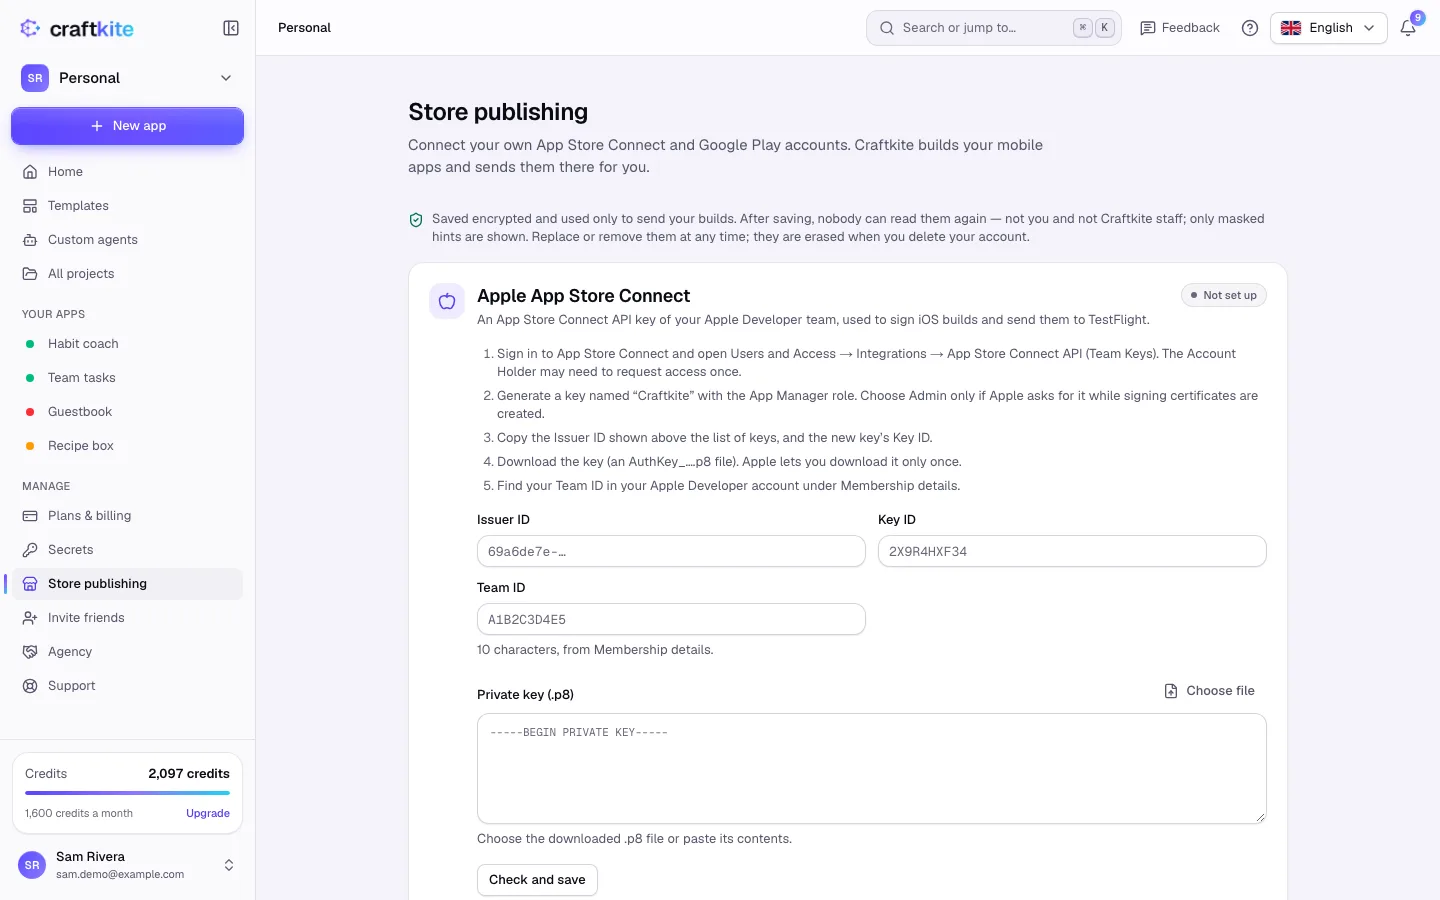
- Apple App Store Connect: create an App Store Connect API key (Users and Access → Integrations) with the App Manager role. Enter the Issuer ID, Key ID, Team ID and the Private key (.p8).
- Google Play: create a Google Cloud service account with a JSON key, turn on the Google Play Android Developer API and invite the service account in Play Console with release permissions. Upload the Service account key (JSON).
Click Check and save. The studio shows whether the store accepted the credentials. They are stored encrypted and used only to send your builds; nobody can read them again, not even Craftkite staff.
Step 2: build and send
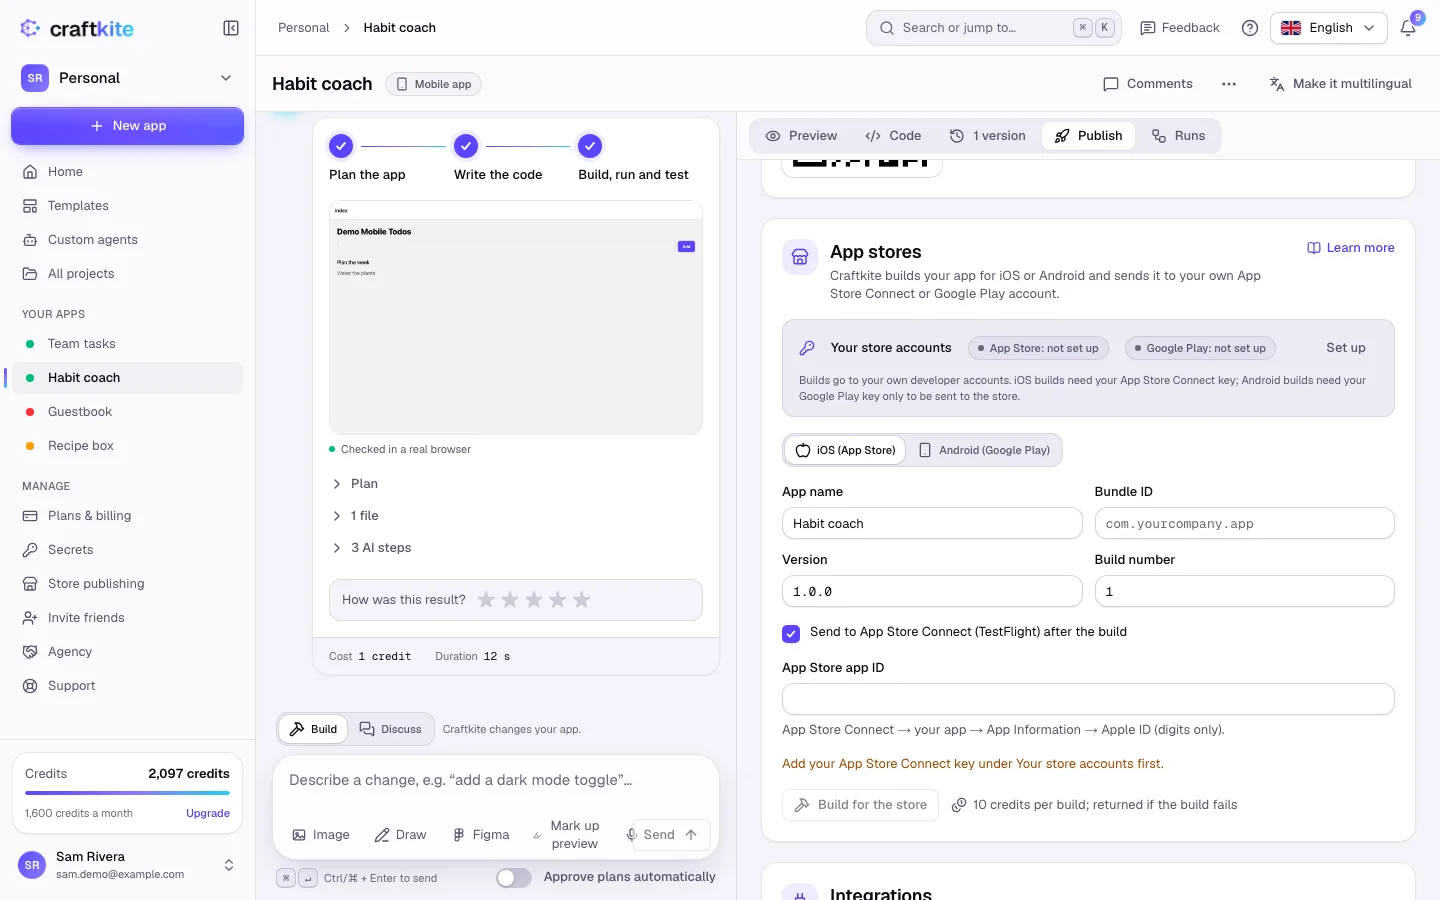
- Open the mobile project’s Publish tab and find App stores.
- Choose the Store, then check the App name, the Bundle ID (iOS) or Package name (Android), the Version and the Build number.
- For iOS, tick Send to App Store Connect (TestFlight) after the build and enter the App Store app ID. For Android, choose the Google Play track: internal, closed or open testing, or production.
- Click Build for the store and follow the Steps until it shows Sent to the store. You can also Download build.
Good to know
- Each store build uses credits (shown in the section); they are returned if the build fails.
- Google requires the very first build of a new app to be uploaded by hand: download it from Craftkite after a build and upload it once in Play Console.
- In a team, owners and admins manage the team’s store accounts; every editor’s store builds use them.